Taking screenshots on your PC is one of the easiest things to do. Especially Windows 11, which has enhanced and simpler ways of taking screenshots than previous versions. However, There are multiple ways by which you can take screenshots, and one should know at least two to three ways to snap your screen.
Also, different methods can help you take different types of screenshots. For example, the snipping tool helps snap a particular area, whereas the Print Scrn key screenshots the entire computer screen. Here are the top 5 ways you can take screenshots in Windows 11:
- Snipping Tool via App
The snipping tool is one of the most convenient regarding preferences, allowing different modes to capture screenshots. Follow these instructions to snap screenshots using the Snipping Tool app:
- Go to Start.
- Enter “Snipping Tool” to launch the app and choose the first result.
- Choose from the several screen capture modes, such as rectangle, window snip, freeform, and fullscreen.

–Rectangular Snip: This captures a screenshot of the rectangle area of the screen that you’ll draw.
–Free-Form Snip: Using this mode, you can draw whatever shape you desire, and the screenshot will be captured after you quit pressing the right-click button.
–Windows Snip: As the name suggests, you can use this mode to capture a specific computer screen window.
–Full-Screen Snip: The full-screen snip takes a screenshot of the entire computer screen.
- While this step is an option, you can also use the Delay option to postpone the capture for up to 10 seconds.

- Select the New button.
- Create a new screenshot in the mode you choose.
The snapshot will appear in the Snipping Tool editor after you’ve finished the procedure, where you may save or edit it before sharing.
If you believe you’ll be using the complete Snipping Tool often, you can pin it to the taskbar by opening the program, right-clicking on the app’s icon on the taskbar, and selecting Pin to Taskbar.
- PrintScreen Key (Print Scrn)
The next method you can use is the shortcut Print Scrn key at the top of the keyboard. It is helpful to take a screenshot of the entire screen quickly. The whole desktop picture copies to the clipboard when you press the Print Scr key, which is also frequently written as Print Screen.
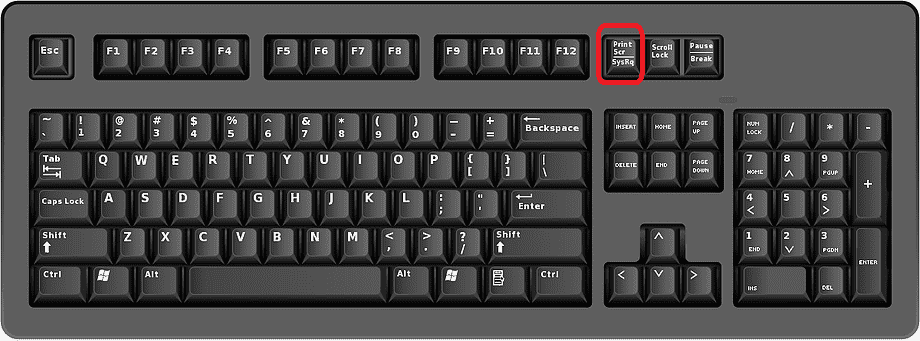
When the PrtSc key is pressed, the screenshot is immediately copied to the clipboard. The user won’t be informed that a screenshot was captured.
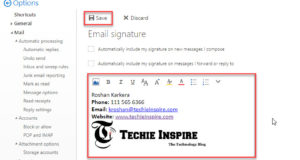
With Ctrl+V or by right-clicking and choosing the paste option, you may examine this snapshot after pasting it into applications like Microsoft Word, Paint, or even the email body.
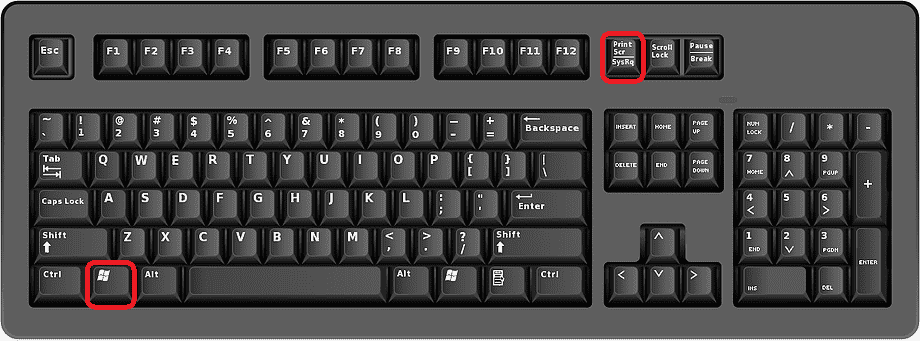
- Windows+ Shift + S
This method is the shortcut to the above-discussed snipping tool. Here, you can press the shortcut keys Windows+ Shift + S together and choose the mode you want to take the screenshot in. It appears as follows:

When you drop the cursor, a notification with a thumbnail image of the photo shows in the lower-right corner. Remember that this method also copies the screenshot to the clipboard, so if you only need to paste it into a different application, you may skip it.

- Windows+ PrtSc
Another convenient way to capture a screenshot in Windows 11 is to use the Windows+ PrtScn shortcut. This shortcut instantly saves your screenshot as a picture in the Screenshots folder. As soon as this happens, your screen will go dim, and a snapshot will be saved to the folder.
You can access the screenshot by navigating to the Screenshots folder. Use File Explorer (Windows key + E) and go to Pictures on the left side panel, File Explorer<Pictures<Screenshot Folder.
- Xbox Gamebar
Did you know that the Xbox Game Bar can snap screenshots on Windows 11? You may be aware of this if you’re a dedicated player. It can capture your entire screen, except the Windows toolbar. The screenshots are stored in the following directory:
- Press the Windows + G Key.
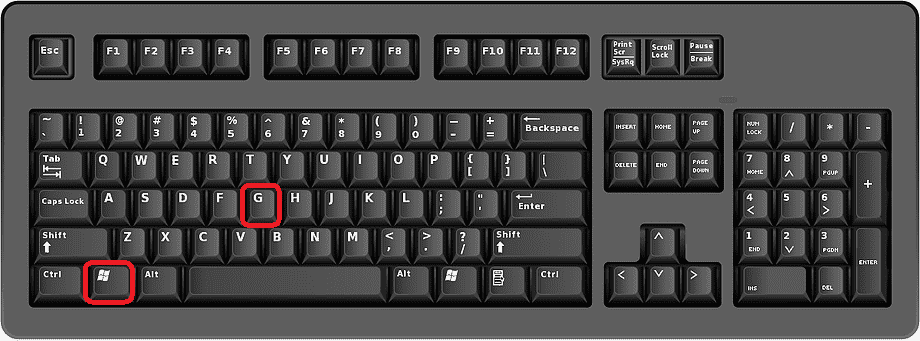
- Click the Capture button – the camera symbol – in the top menu to bring up the Capture option in the overlay menu.

- To capture a screenshot, click the camera icon in the Capture menu. By hitting the record button, you may also capture a video clip with the option to incorporate audio by selecting the microphone symbol.
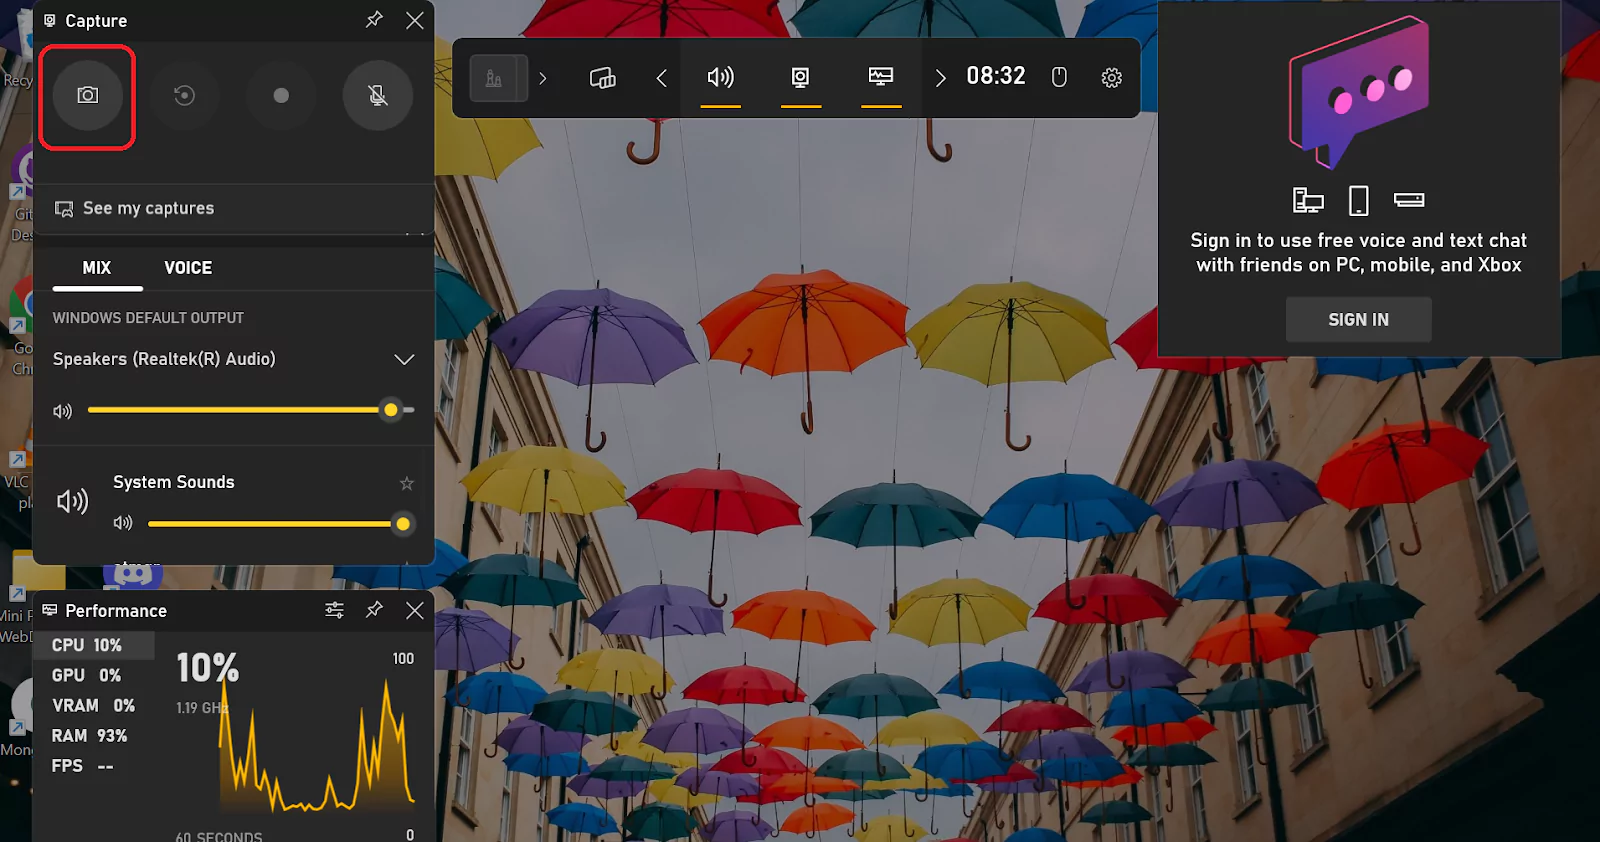
Screenshots and video clips collected by the Game Bar are stored in PNG and MP4 formats and may be found in File Explorer in the Videos > Captures folder.
Wrapping Up
From the above top 5 ways to take screenshots, you can choose and decide which suits you best for your work. It depends on whether you want to picture a particular region or the whole screen. Also, you can record dynamic web content, for example, an entire website, via snapshot, but that requires the installation of some third-party applications and browser extensions.