
How To Add a Second SSD to Laptop (w/ or w/o M.2 Slot)
Upgrading storage is just as easy as upgrading RAM. Yup, you just need to slide your new storage drive right in just like you insert a USB drive into an USB port.
Depending on what kind of laptop you have, there are two ways to go about this. The first method is the easiest one!
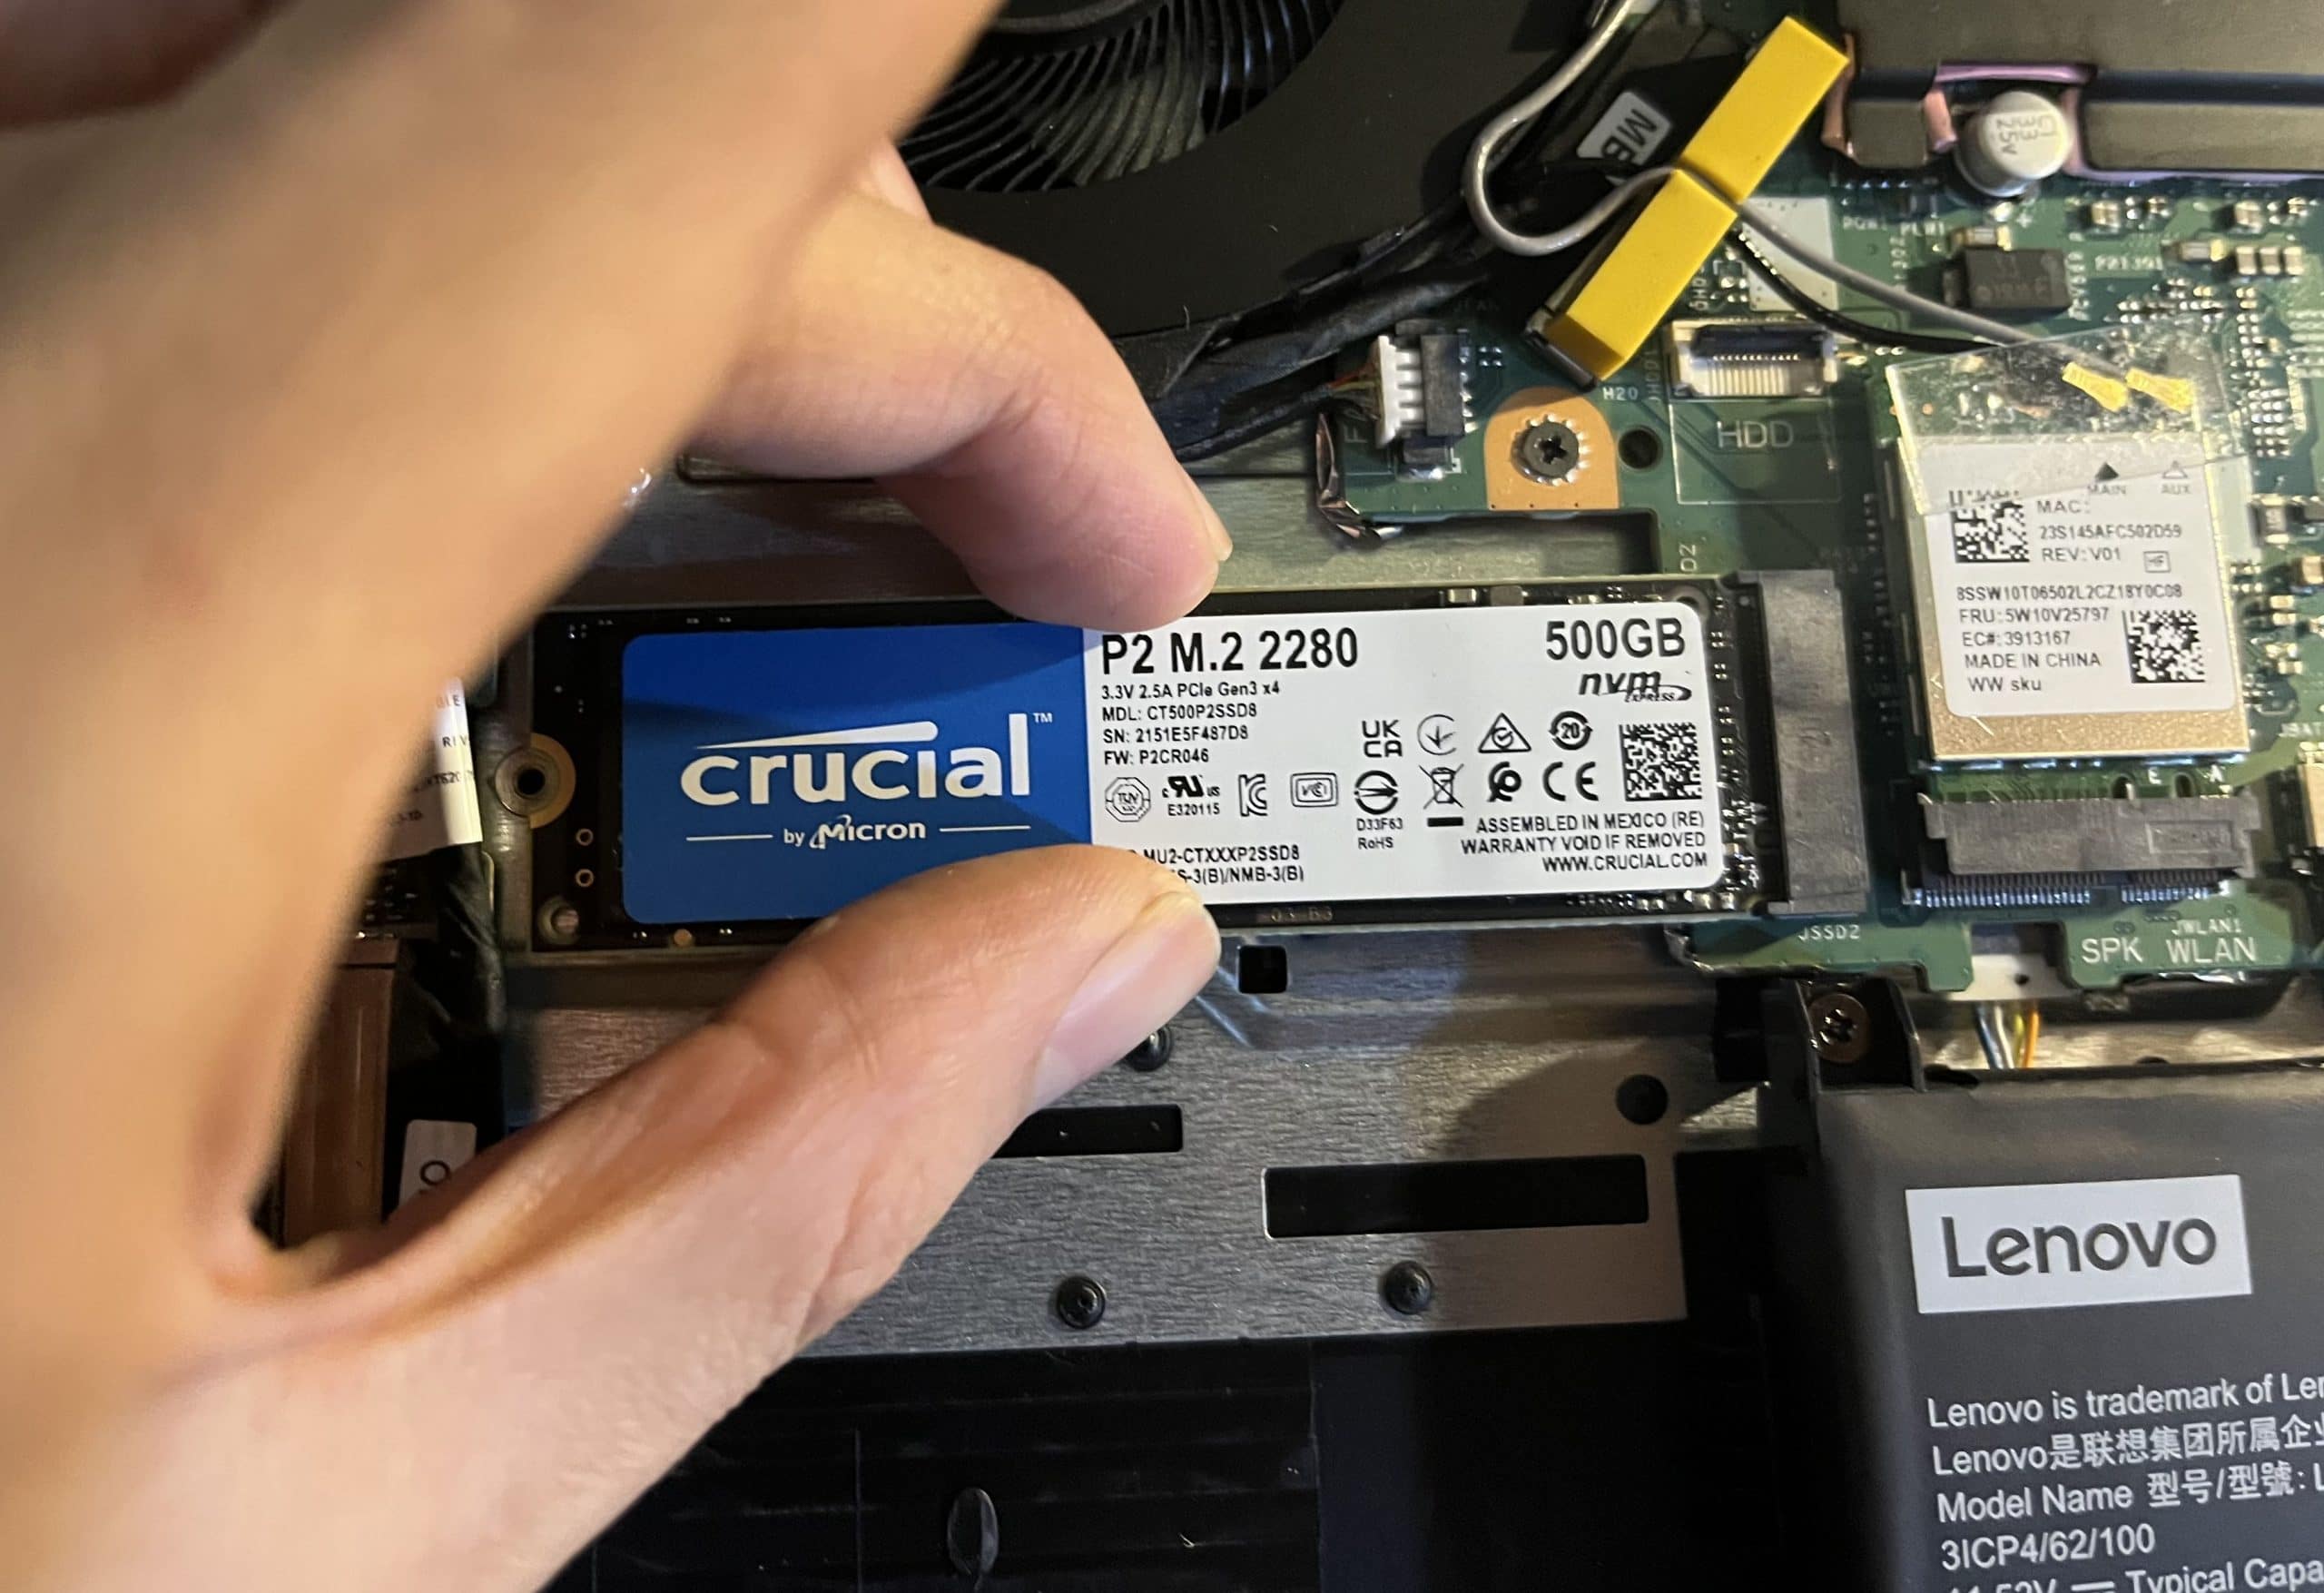
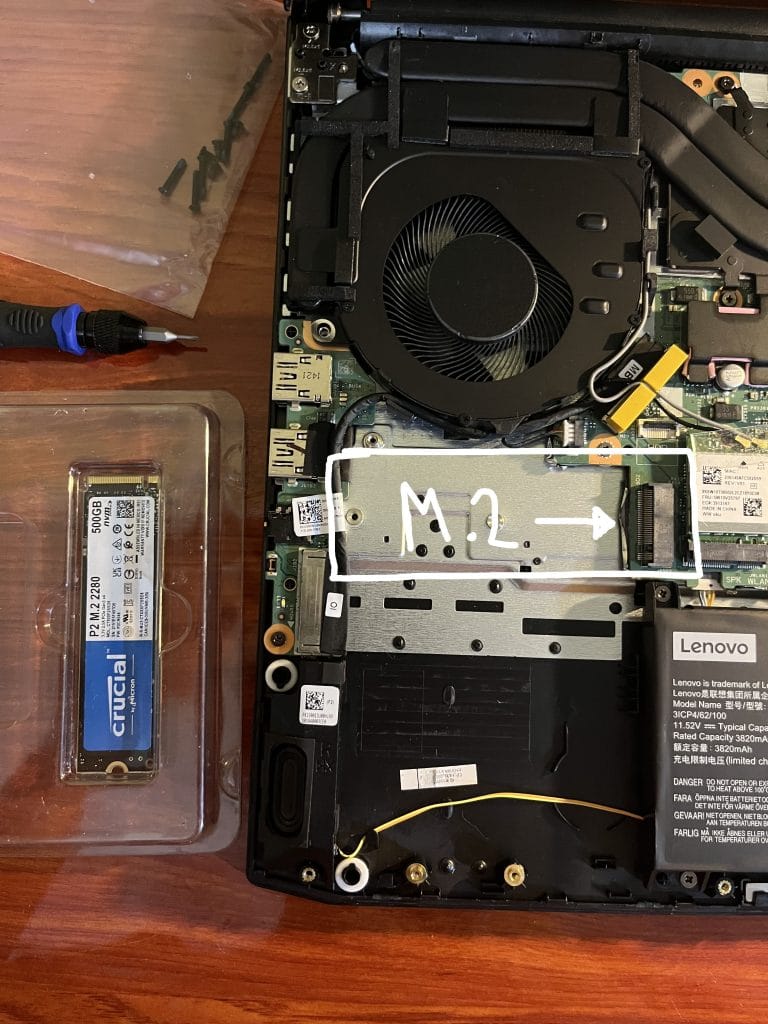
a) M.2 SSD Upgrade:
It’s called M.2 because the SSD you see in the picture below has a M.2 form factor thus it fits into the M.2 slot.
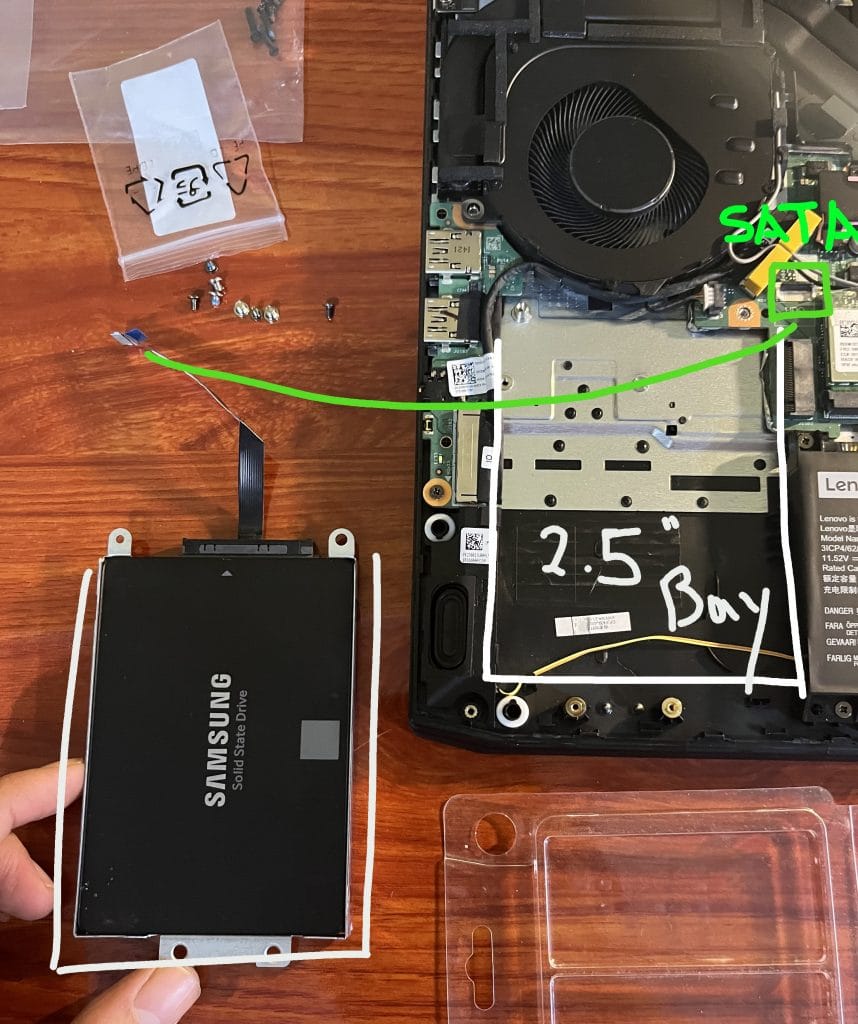
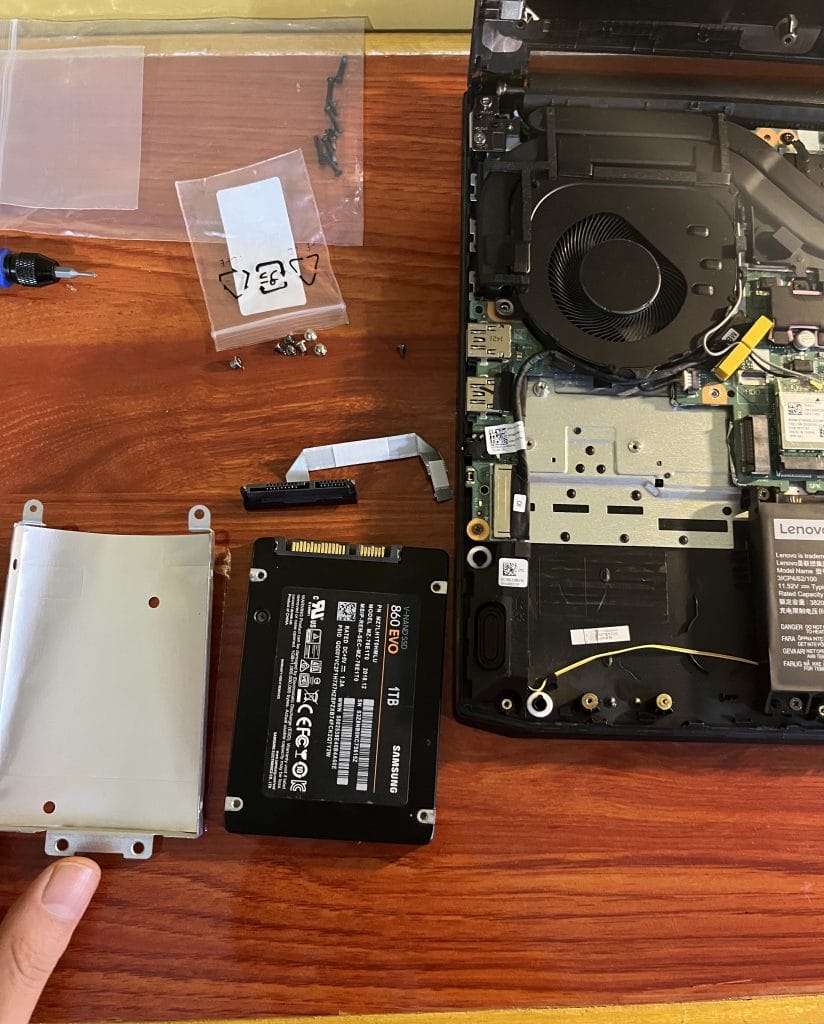
b) 2.5 ” SATA Upgrade:
Like wise, it is called SATA upgrade because the 2.5” SSD Drive you see below it’s connected to the SATA port ( green ) below.
What’s the difference? Which of the two is the best way to do it?
Assuming you can do the installation correctly, there’s no difference in performance.
Using an M.2 SSD however will make transfering files from one place to another (USB/external HDD) slightly faster thus if you are a photographer moving files ALL the time ALL day you may save yourself a few minutes here and there.
For gaming and any other purposes, both upgrades give you the same performance.
Which way is the easiest?
If you look at the two pictures, obviously the M.2 SSD upgrade is the way to go. You just slide a SSD stick right in and you’re done.
The 2.5” upgrade, however, requires you to GET A 2.5” CADDY and a SATA connector cable as you can see in the first picture ON YOUR OWN. Manufacturers will rarely give you these tools! So yup it’s rather annoying!
So Should I do the M.2 Upgrade then?
Well if you have the choice yes!
But it isn’t likely your laptop will give you both choices (unless it’s a 2022 gaming laptop).
Thus if your laptop is relatively old chances are you can only do the 2.5” SATA upgrade.
We’ll go over both upgrades here.
Before you do the upgrade:
1. Find out whether your laptop allows you to do a M.2 or a 2.5” SSD .
For that you don’t need to remove the bottom panel.
You can just type your laptop’s model name on google + Upgrades.
Ex: “Acer Aspire 5 Upgrades”
2. Get a New Storage Drive
Ok once you found your options, buy an SSD:
A) If you’re upgrading storage through an M.2 Drive:
I recommend this model here which is the one I used on every laptop on this site and the one we’ll use in this tutorial:
B) If you’re upgrading storage through the 2.5 SSD Drive:
I have no specific recommendations but the one we’re going to use here is the Samsung EVO. We choose it over all the others simply because it is the fastest one.
Note:
If you’re doing the 2.5” bay upgrade, you also need to buy a caddy SPECIFICALLY designed for your laptop’s model. There are some instances in which you may not need to buy a caddy but it’s very rare. You will at least need a SATA III cable conector.
C) Finding a Caddy: Here’s how I find caddyes for the laptops we use on this site:
- Check the manufacturer’s site. (They’ll have one for you but usually very expensive)
- Use the Amazon search bar and type “Laptop’s model + Caddy”. This is going to be much much cheaper.
- Use the eBay search bar to find a caddy. This may not be the cheapest but it’s the surest way to find a Caddy. It will take quite a long time to get it shipped though.
3. Doing the Upgrade
Once you’ve got your M.2 SSD or SATA III SSD.
A) Find the tools to remove the bottom cover
You’re going to need the following tools:
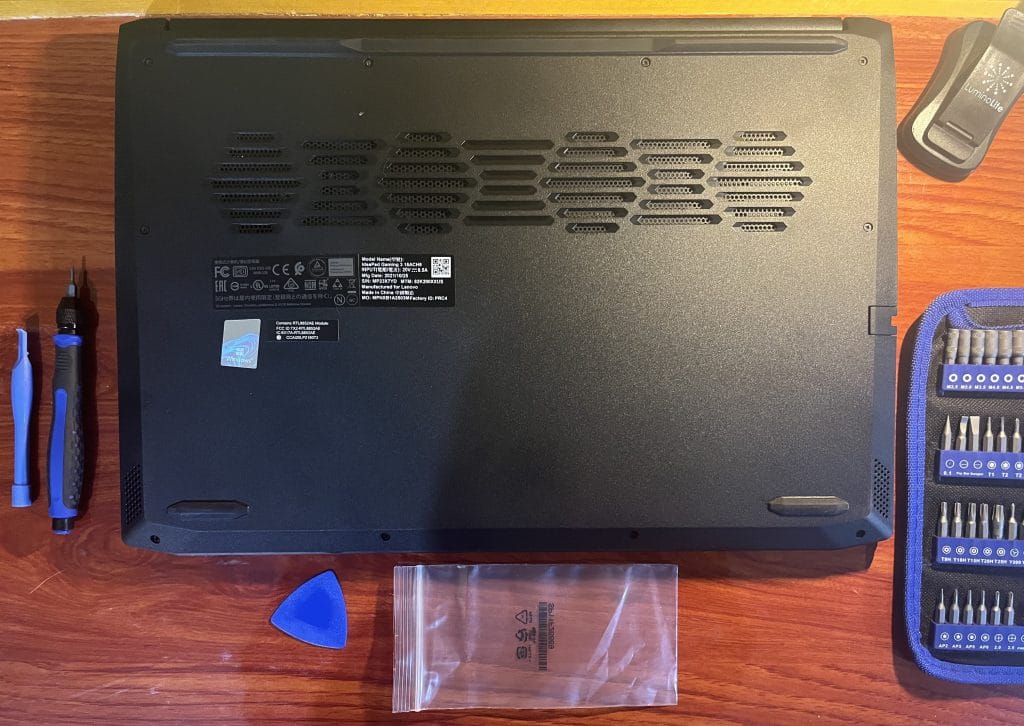
– A screwdriver (has to be small so find a bunch of thin screwdrivers)
– A pick or a plastic spurge (if you can’t find either around the house, use a guitar pick or a piece of plastic)
– A small bag or container (to store the screws in).
– Extra Screws (to place the SSD you’ll need 1 for the M.2 Upgrade and several for the Sata Upgrade). You buy them off here for 5 bucks and get hundreds.
B) Remove the Bottom Cover
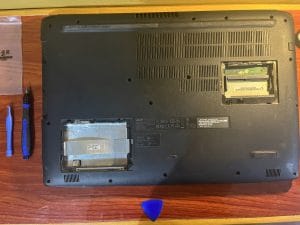
The following assumes your laptop does not have a storage compartment as shown above for which in case you do not need to remove the entire bottom panel just the compartment.

i) Remove all screws
Remove every single screw on sight even the ones that seem unnecessary.

You don’t want to pull apart the cover when there are still screws in, this may damage the plastic (though it won’t really make your laptop stop working, you’ll just have big scratches and dimps).
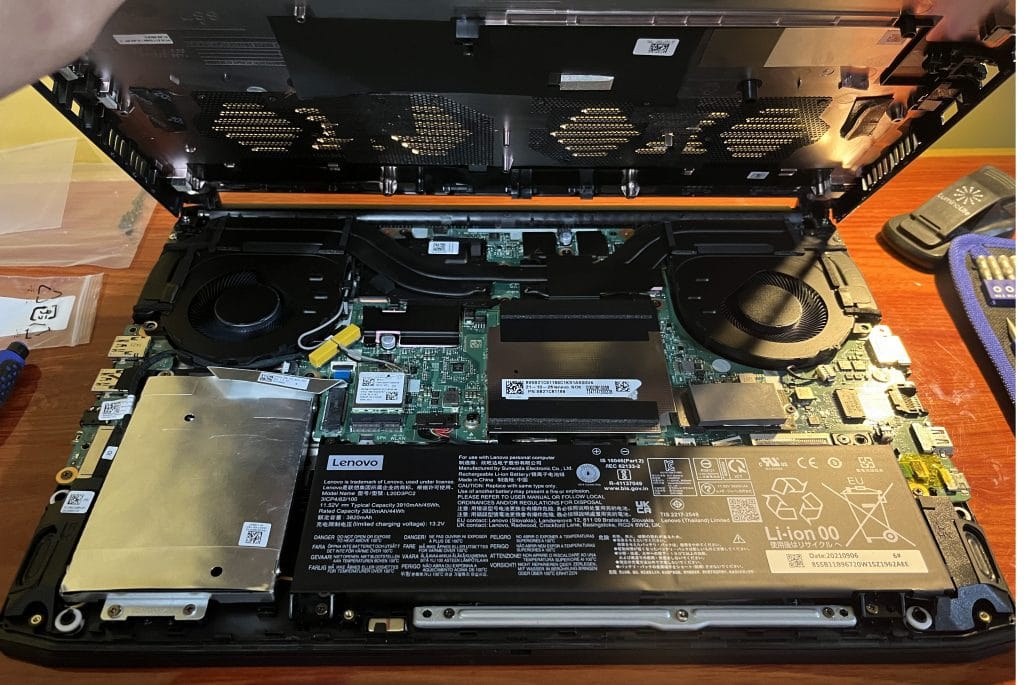
ii) Remove the Bottom Panel
You can use a piece of plastic like a guitar pick and loosen up the bottom cover as shown below:
You can also use (it’s actually better) a plastic spurdge. The bottom cover will easily come out:
C) Install the SSD
i) M.2 SSD Upgrade
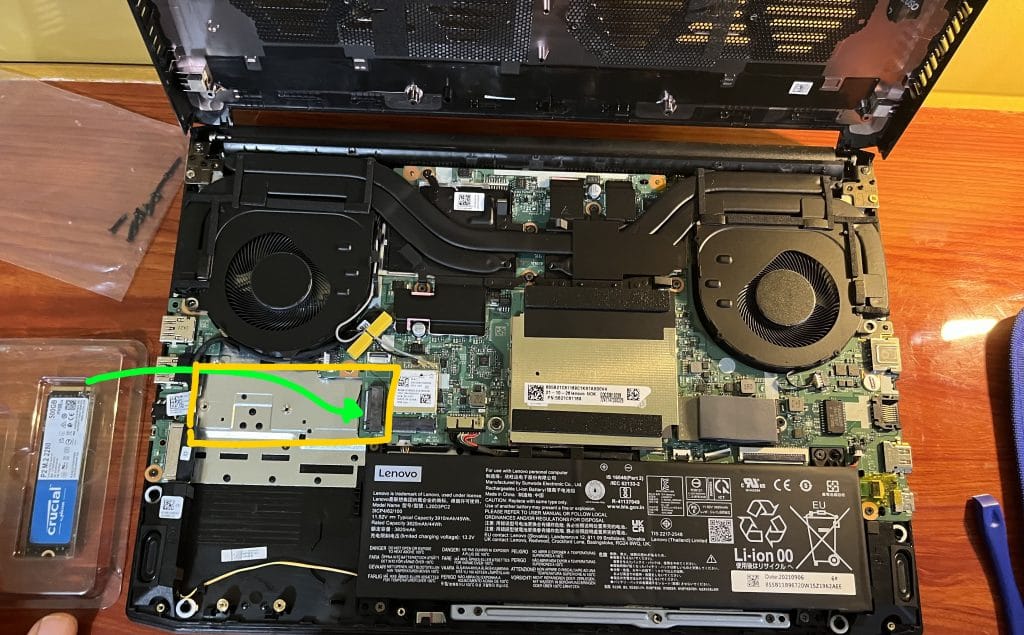
You don’t need to apply much force. Just give it a little thug as shown in the video below.
Screw the SSD in.
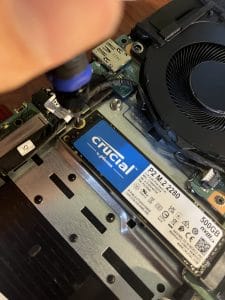
Put the back cover in and You’re done!
There’s a final step you may need to do to make your PC recognize your new SSD. Skip to the last step “Make Windows Recognize the SSD”.
ii) SATA SSD Upgrade
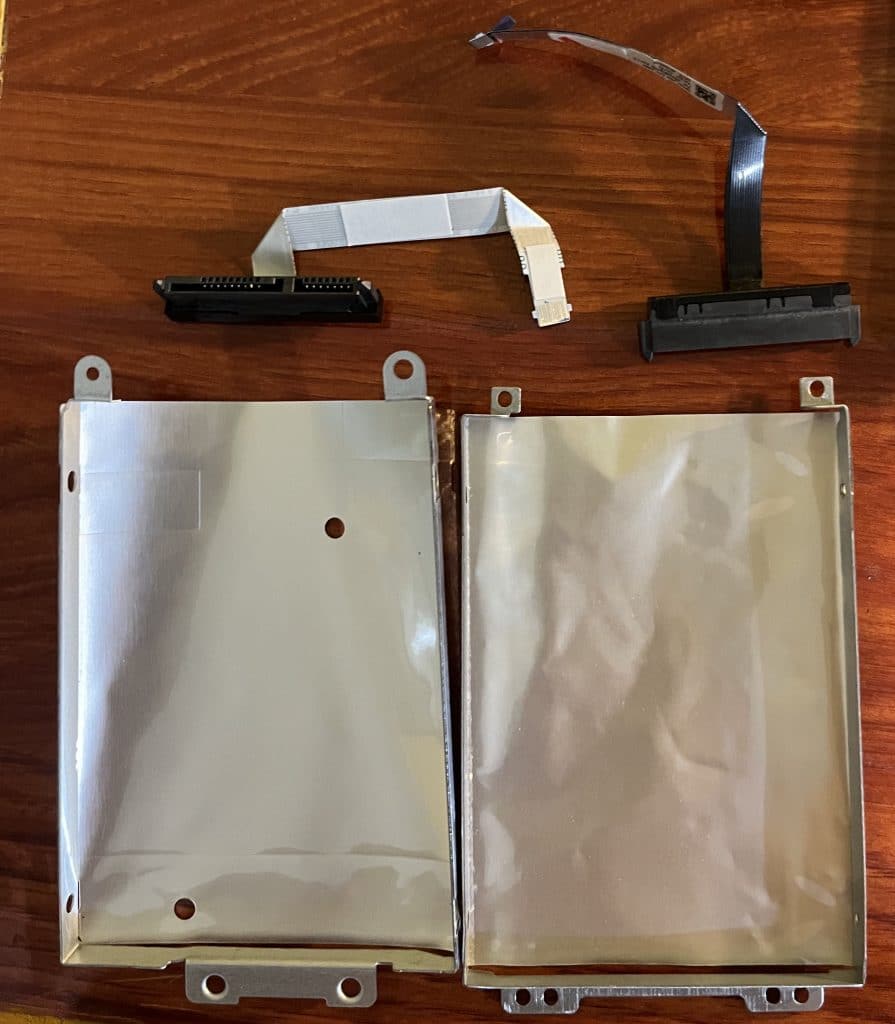
Take the SATA cable and plug it into the SSD Drive
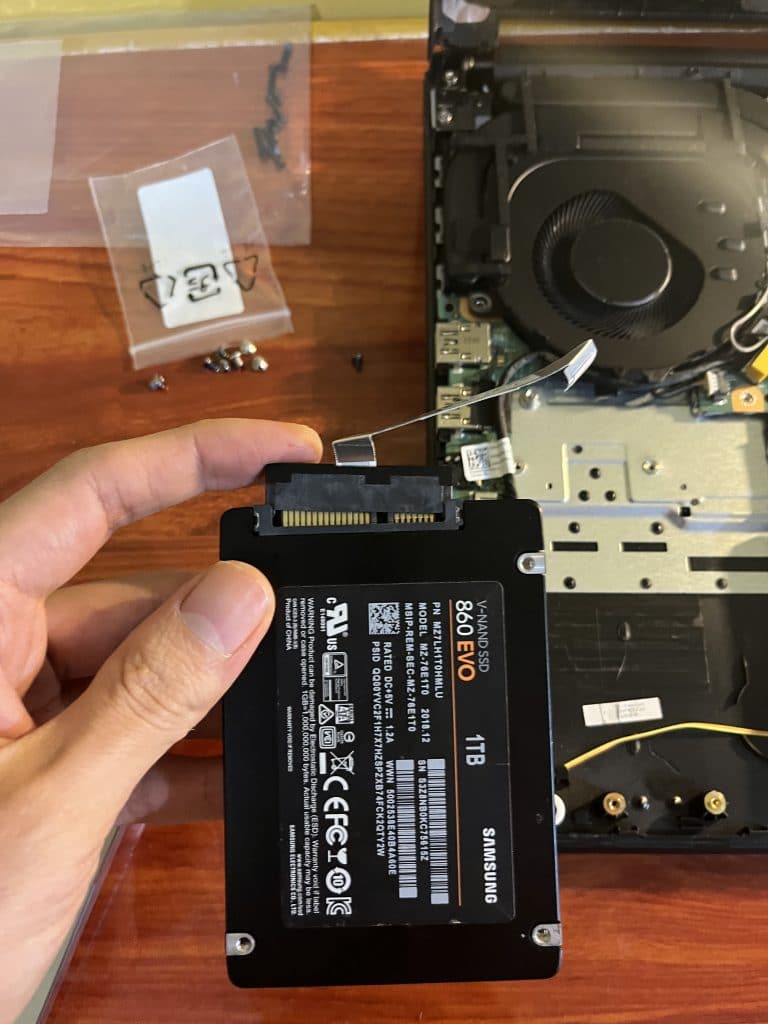
Take the SSD and place into the 2.5 Caddy as shown below.
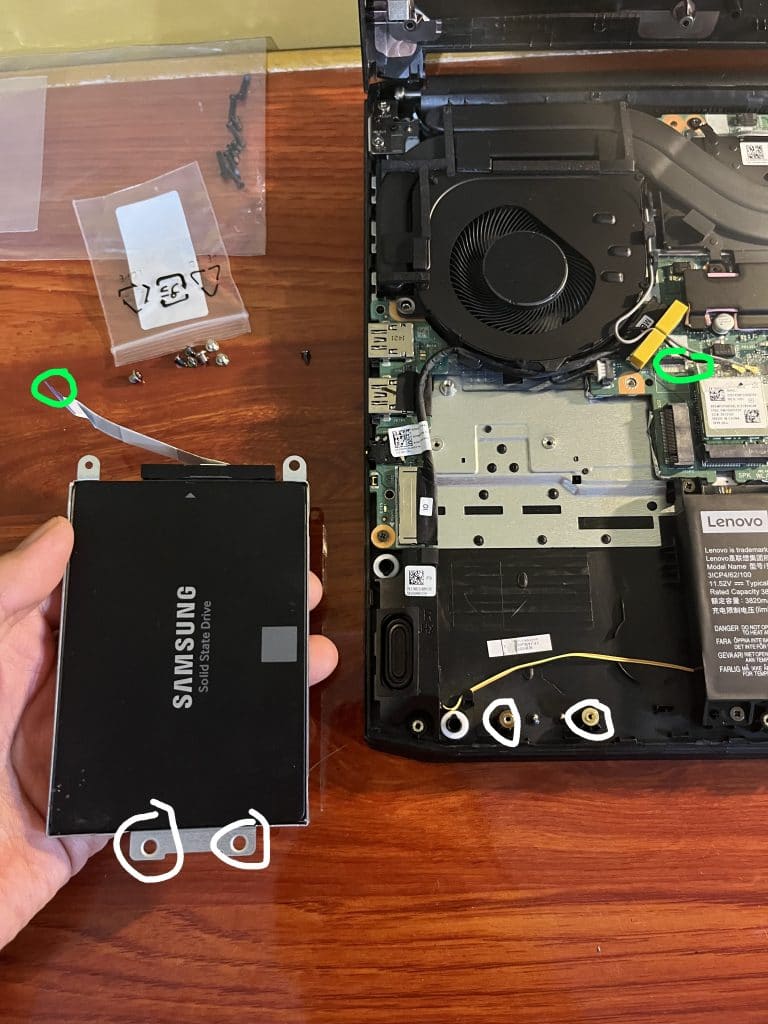
It must be done in such way that the SATA connector can be easily inserted into the SATA slot (green) and the pinholes and screwholes match together (white) as shown below:
If it doesn’t fit, don’t panic. Just flip the SSD over and check whether this time everything fits nicely. If it doesn’t you probably have either the wrong caddy, the wrong SATA cable connector or both.
If it fits, you can now take it screw the SSD into the Caddy. The screwholes are about four and they’re located on its sides as shown below:
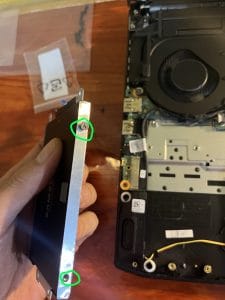
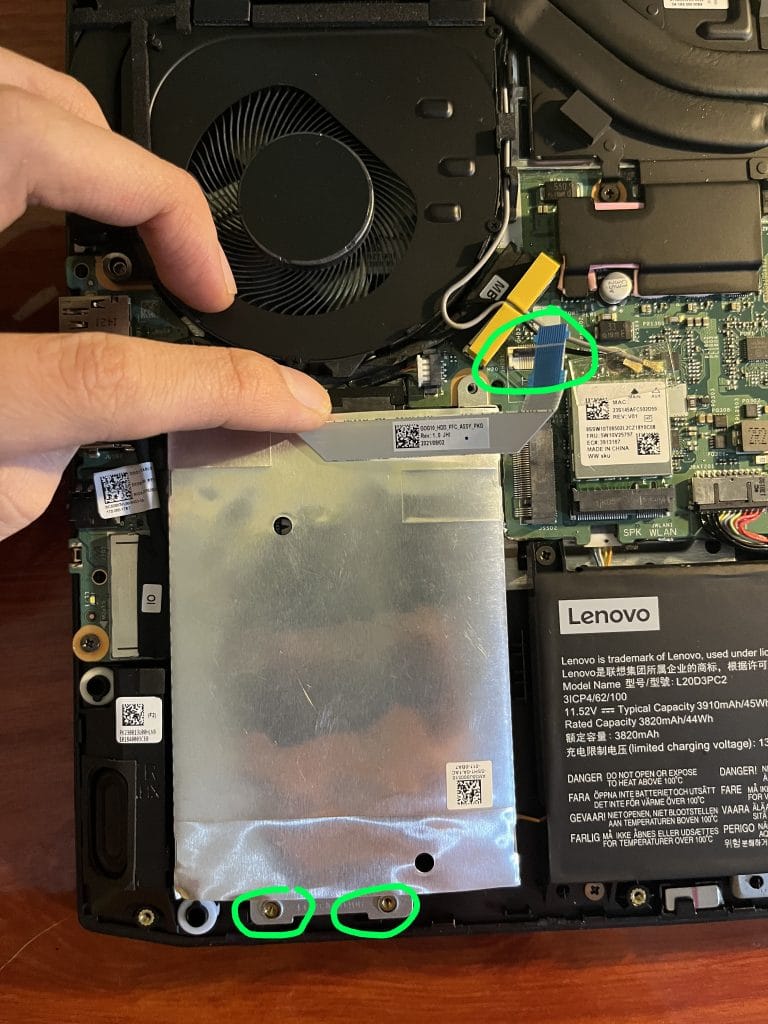
Now place the SSD+Caddy into the 2.5” Bay and connect the SATA cable connector into the SATA slot as shown below. You have to open the small gate (circled in green) before you try to plug in the connector. You do this by lifting it up with one finger.
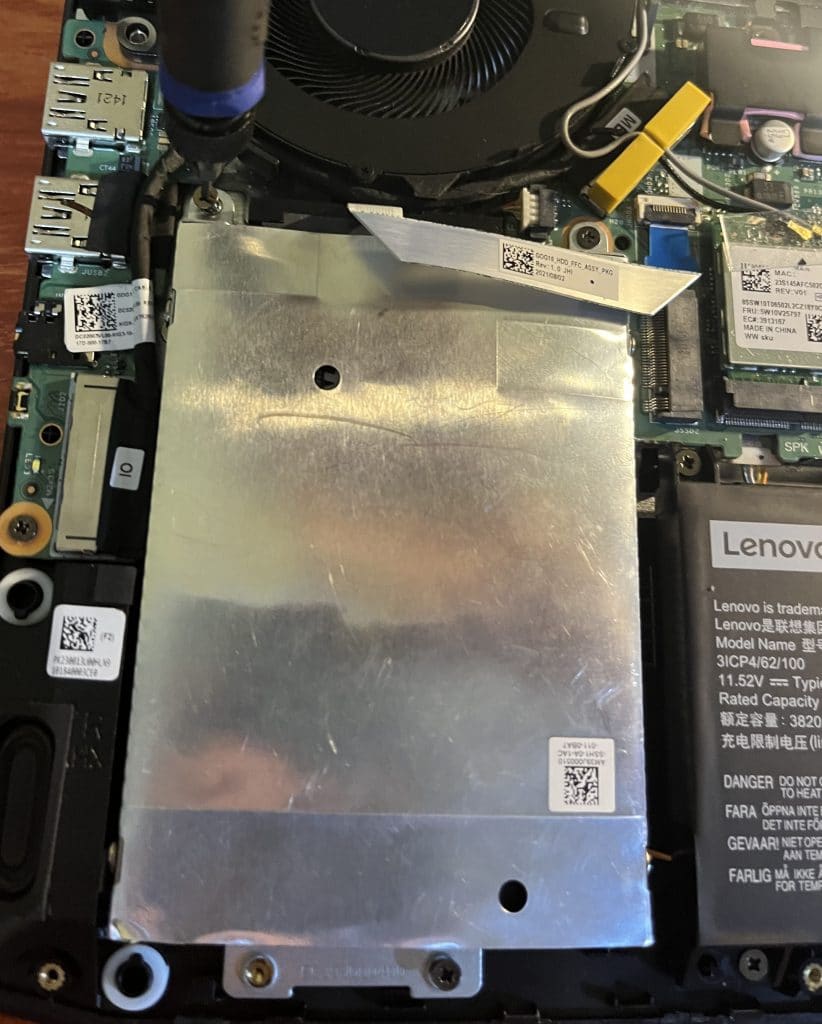
You do this by sliding it from below just like throwing a carpet below the sofa. Once in , it should look like this:
![]()
Now you can push down the gate to secure it in place. After that screw the entire Caddy+SSD into the 2.5” bay as shown below.
And you’re done! You can now put the cover back in!
4) Bonus: Make Windows Recognize your NEW Storage Drive
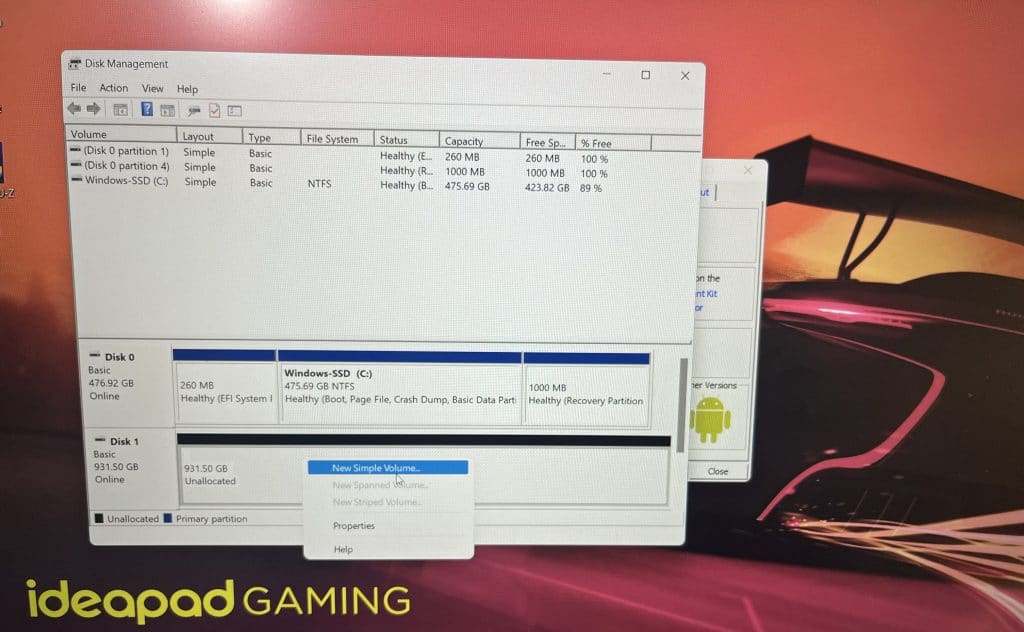
Type Disk Management in the Windows Search Bar and click on the first result. This should pop up:
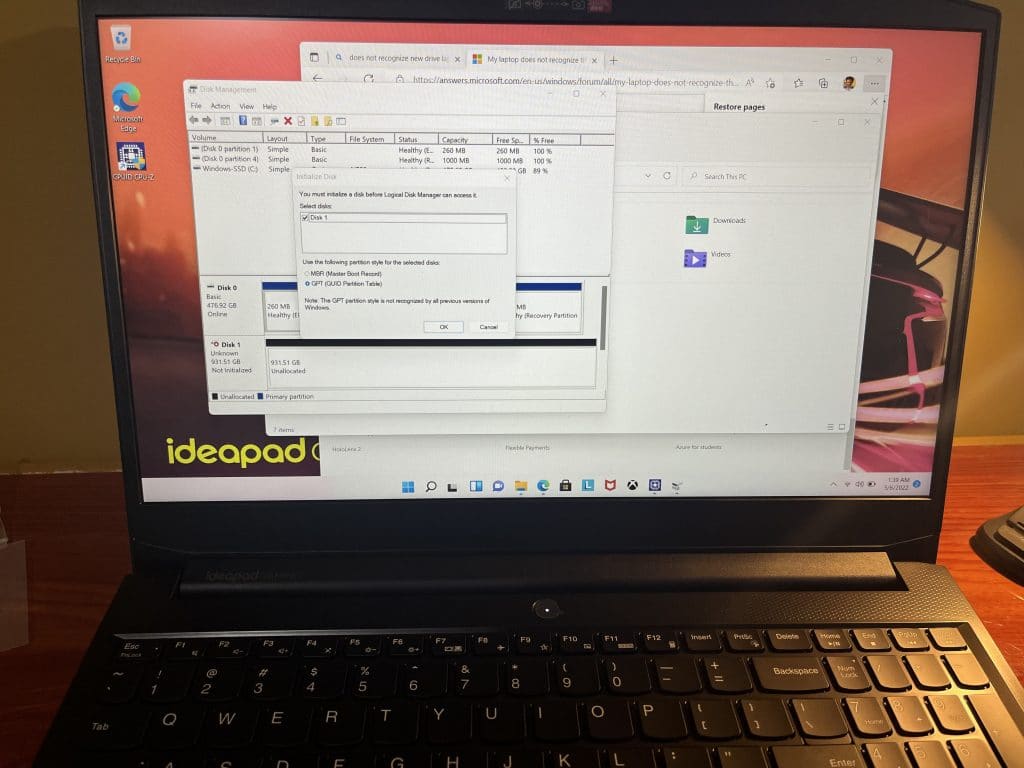
Right click on Disk #1 “Unallocated” and click on New Sample Volume:
A wizard will pop up just click next, click next and then choose whether or not you want to partition the new SSD Drive.
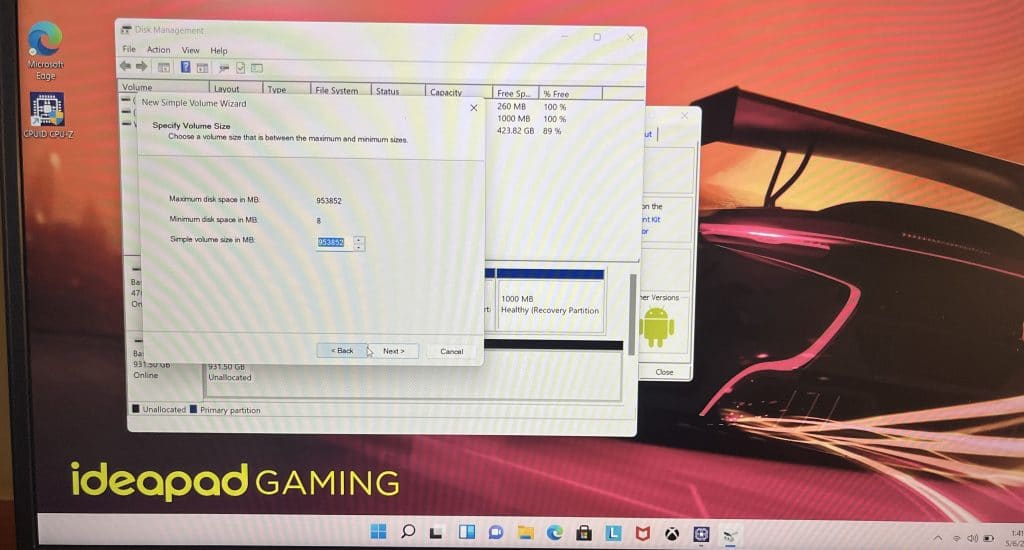
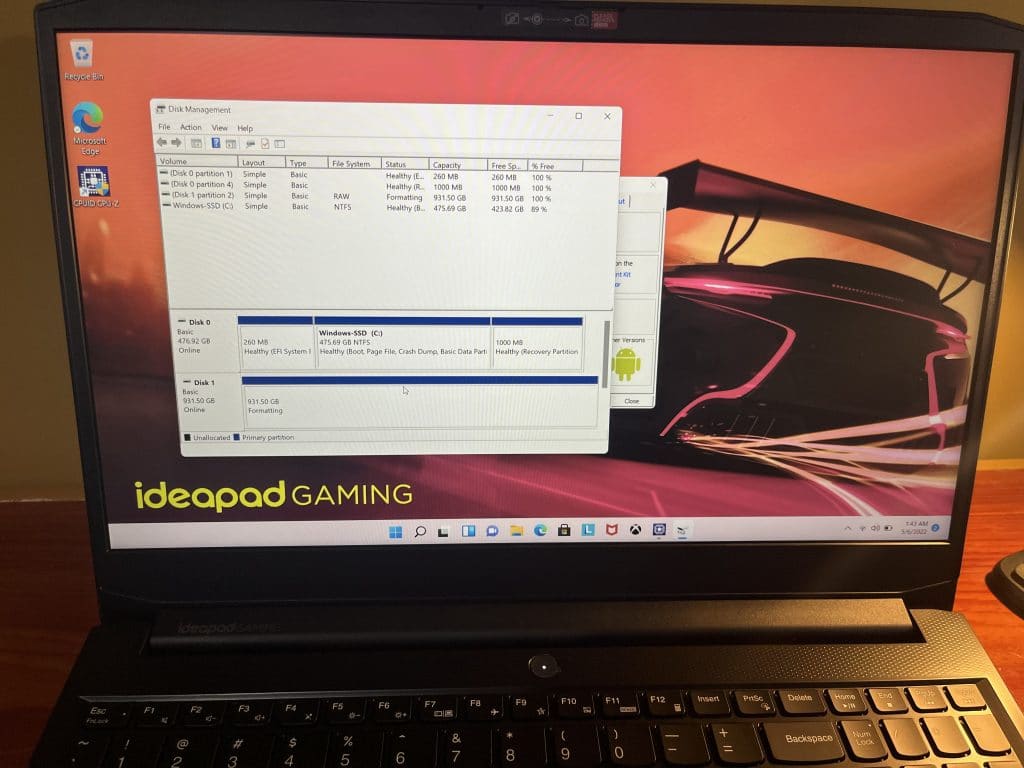
Or just click next next and next and the new SSD Storage will not be partitioned and you’re done. There will be a quick automatic formatting then you’re ready to go!
Comments?
If you have any questions, suggestions or recommendations please leave a comment below.
Author Profile

- I am physicist and electrical engineer. My knowledge in computer software and hardware stems for my years spent doing research in optics and photonics devices and running simulations through various programming languages. My goal was to work for the quantum computing research team at IBM but Im now working with Astrophysical Simulations through Python. Most of the science related posts are written by me, the rest have different authors but I edited the final versions to fit the site's format.